Feature Templates are an often overlooked, yet powerful, tool to enable default values when editing a layer in ArcGIS Online. They can be used to build up editing logic and have the power to automatically create data in your web applications. In this blog, I hope to demystify Feature Templates and give some examples of how they can be leveraged for quick editing workflows.
Feature Templates work by defining categories of items that editors are allowed to add to a feature layer, based on specific combinations of attributes. They can also auto populate field values, so you can quickly log data using a Feature Template. For the data manager they ensure that data integrity is preserved and the feature classification is all ready to go.
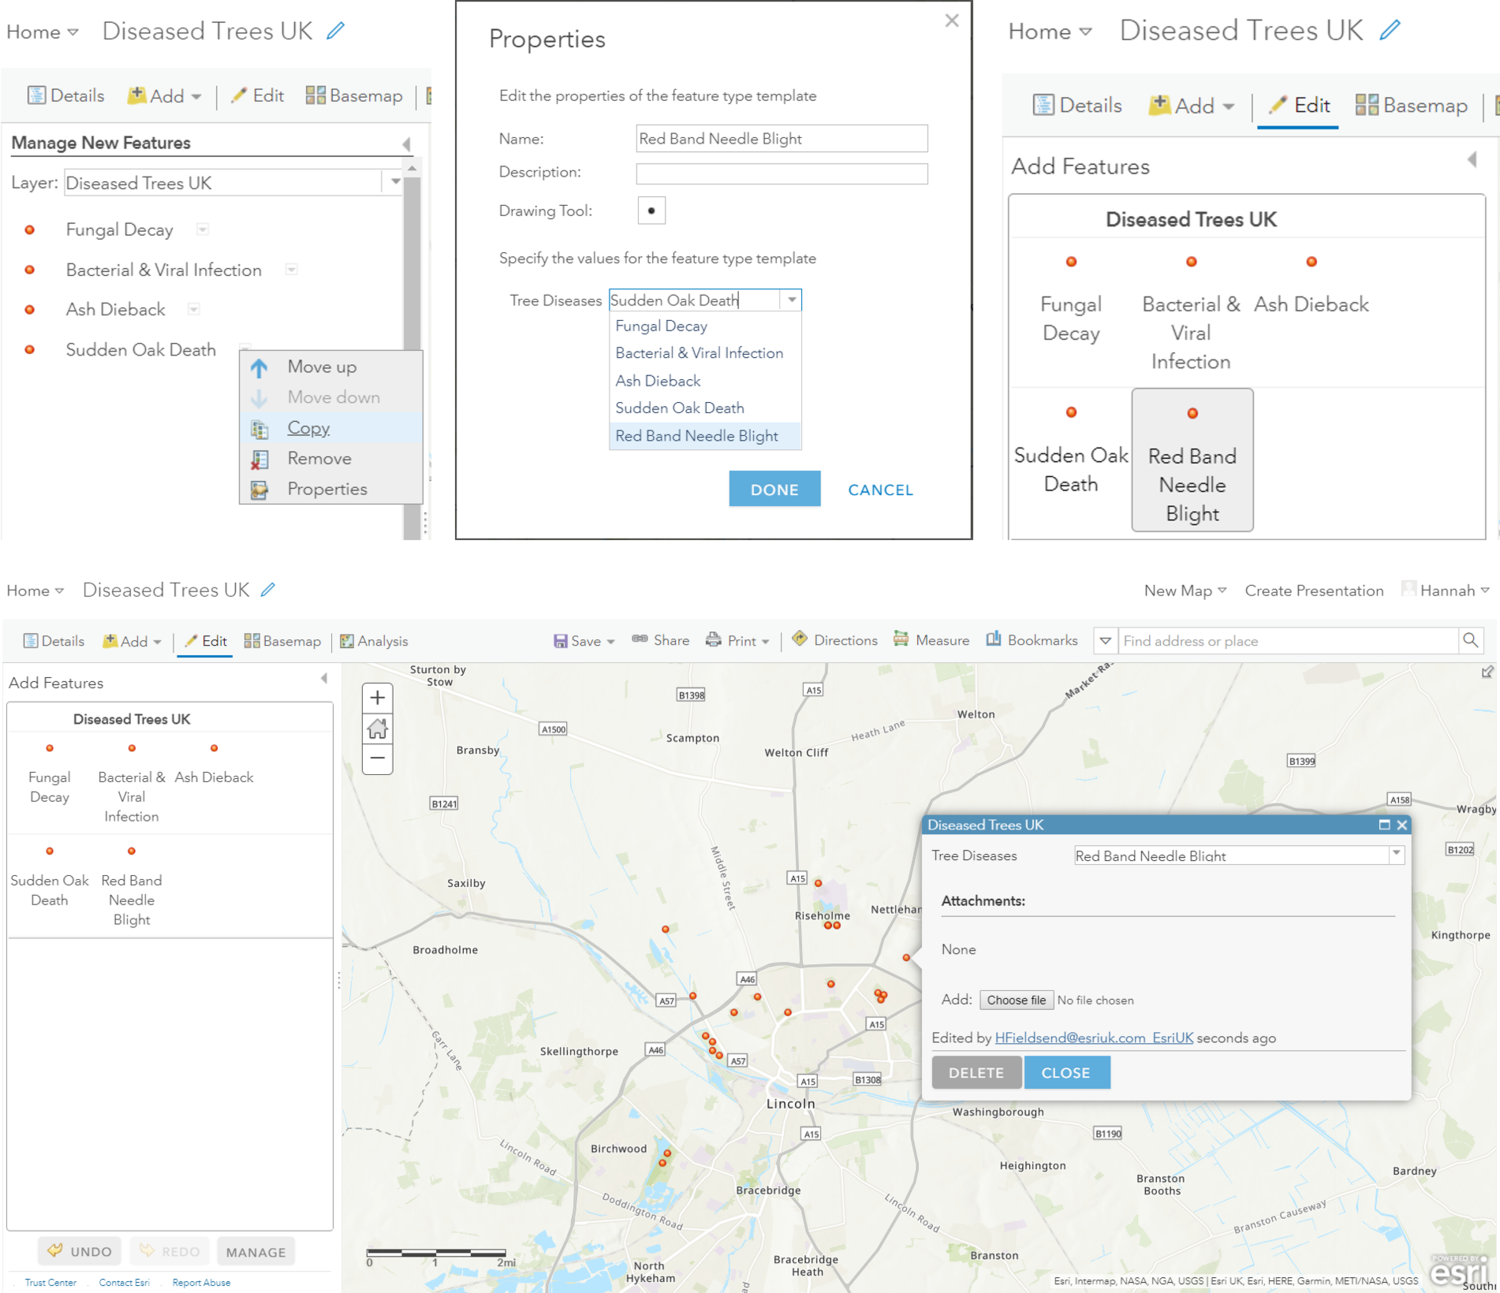
Sometimes Esri’s language doesn’t help itself with lots of similar names for different things. Below I’ve tried to clarify this with some screenshots showing what I mean by a Feature Template. Using this slightly gloomy example, different types of tree disease are populated as feature types within the template, which then drives the automatic collection of these features in the layer. The first image shows a new Feature Template being created by copying an existing one and altering some Properties.
Setting up a feature template to capture different types of tree disease.
Feature Templates can allow you to show different representations of the same assets to different audiences - magic! (Not really). Here, I’ll walk you through the process of adding, removing and updating a Feature Template to fit my requirements. I’ll use this template to support a Workforce and Collector for ArcGIS example for Work Orders, sticking to the forestry theme.
I created a Workforce project for capturing Tree Work Orders using two assignment types: ‘Diseased Tree’ and ‘Fallen Tree’. Now, this is where the names can get confusing, but stay with me.

Using the Assignments Layer created by this Workforce project, you can create a Hosted View Feature Layer (or just View Layer), making sure to Enable Sync and Enable editing under the Settings tab, so that it can be taken offline later. Hosted Feature Layer Views allow you create multiple unique windows into your data, and customise them to fit your audience. In this example, the View Layer will be used as a way to filter the data. It is just a window to the Workforce assignments layer, but tailored to a different audience. Under Visualisation, I Set view definition to define which features my field crew can see and edit, which filters the view of the Status field to show as ‘Unassigned’.
Opening this View Layer within Map Viewer is where we manage some nifty Feature Template edits. I removed all of the ‘Status’ features except for ‘Unassigned’ and ‘Assigned’. Within Properties, I renamed ‘Unassigned’ features to ‘Diseased Tree’, set the Status value as ‘Unassigned’, Priority to ‘Medium’, and Assignment Type to ‘Diseased Tree’. I did the same for the ‘Assigned’ features, this time changing the name to ‘Fallen Tree’, and gave it a higher priority value.
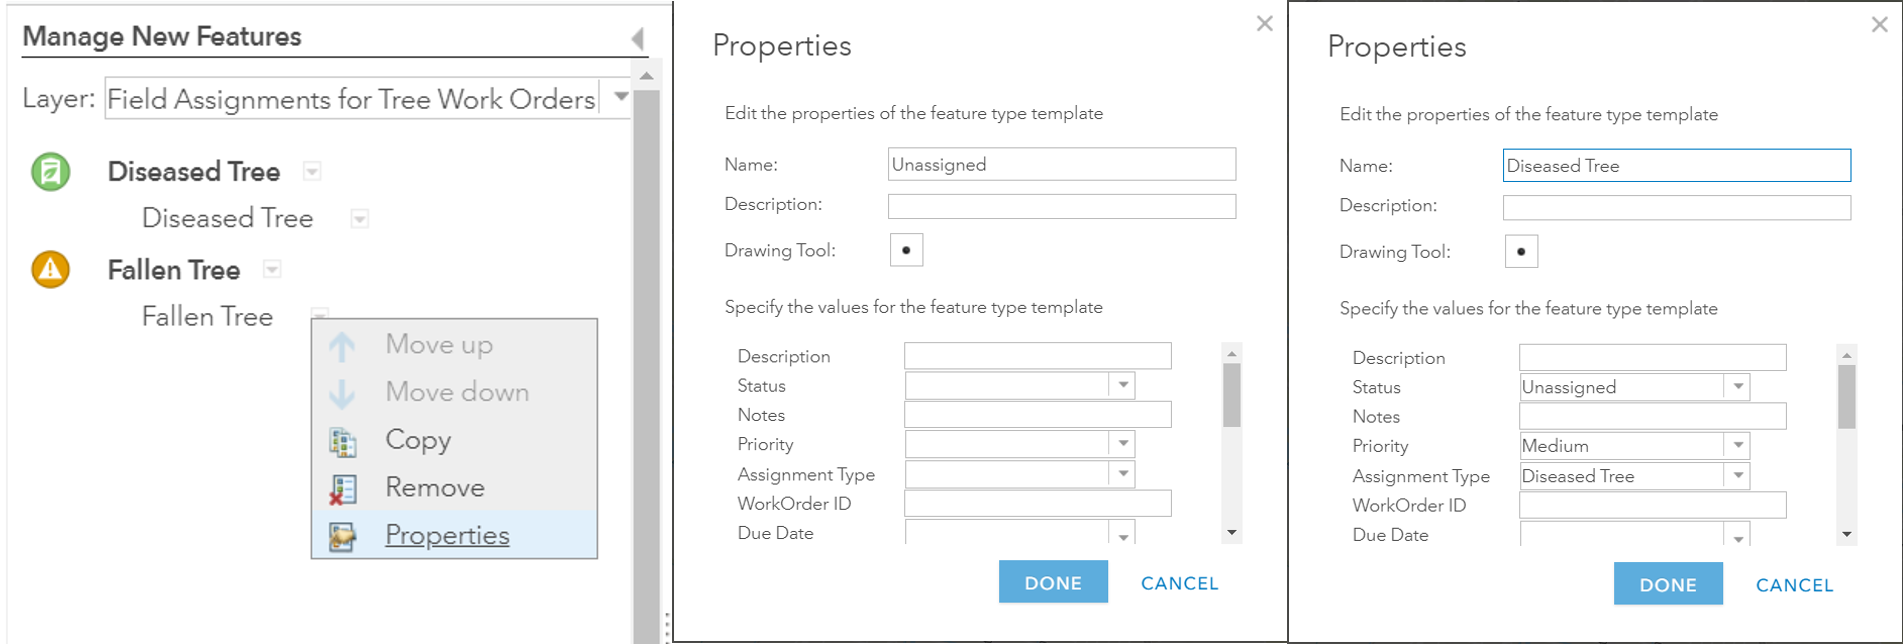
Setting up a feature template to make workforce tasks more intuitive to field staff.
We want to do this within a View Layer because Workforce is sensitive to whatever happens within its main dataset, but the changes made through the View Layer’s Feature Template creates output that will be honoured in Workforce. When workers in the field are adding assignments, Workforce can pick them up properly as data is automatically logged by the Feature Template in the right format. The Feature Template also works to ensure editors do not enter invalid values for important attributes.
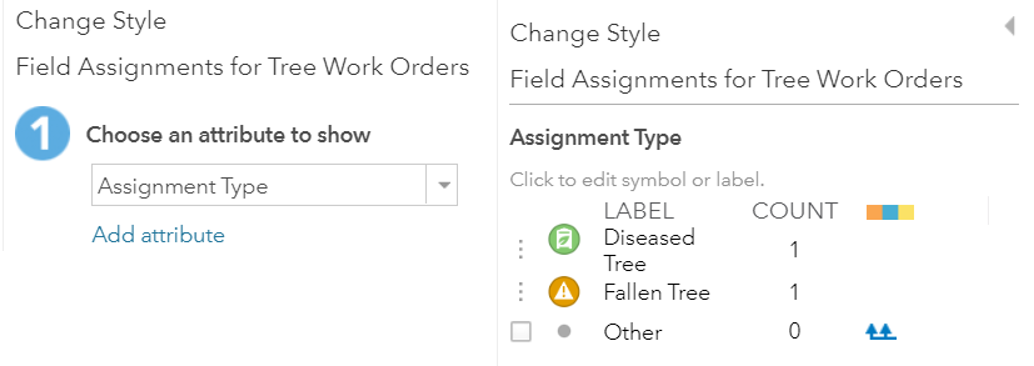
I changed the symbology to something slightly more exciting, and made ‘Assignment Type’ the attribute shown.
After this I saved the View Layer as a new map. This ‘Field Crew Tree Order Map’ is my active map within Collector.